From Market Square to Blackberry Cobbler

I went to the Market Square Farmers Market just to browse. And if you're anything like me, you realize that "browse" means "spend all the cash you have in your wallet." Saturday, I had $20. So I bought some of these zinnias,


a carton of blackberries


and a carton of blueberries.


I found this recipe for Blackberry Cobbler that A Thoughtful Eye shared from the Blackberry Farm cookbook. I was surprised at how not complicated it was, so decided to give it a shot. 


Blackberry Farm's Blackberry Cobbler

3 cups fresh blackberries
1 1/4 cups sugar (1 cup goes with the blackberries, 1/4 goes with the flour.)
Zest and juice of 1/2 lime
1 tablespoon cornstarch
1 1/4 cups all-purpose flour
1 1/4 teaspoon baking powder
1/4 teaspoon baking soda
1/8 teaspoon fine sea salt (didn't have this, used regular salt. Don't know what I'm missing out on...)
6 tablespoons (3/4 stick) unsalted butter, cut into small cubes and chilled
1/4 cup buttermilk (don't buy buttermilk! Do this instead.)

Preheat your oven to 350.

Pretty little lime zest. 

In a large bowl, toss the blackberries, 1 cup of sugar and lime zest.
In a small bowl (cereal bowl works great), whisk together the lime juice and cornstarch until smooth.
Drizzle the lime juice mixture over the blackberry mixture and toss to combine.
Scrape the blackberry mixture into a 10-inch cast-iron skillet and set aside. (*You can use a normal baking pan. But if you're like me and jump at any chance to buy something else to clutter your kitchen cabinets, I found mine at Target for $15.)


In a medium bowl, whisk together the flour, baking powder, baking soda, salt and 1/4 cup of sugar.
Use your fingertips to rub the butter into the flour mixture until it is the texture of coarse meal.

(I have no idea what that means. I just kind of blended it all together and the butter was still in little chunks. I tried rubbing the butter into the flour with my fingertips, but it was more than I wanted to commit to this endeavor. Choose your own adventure -- mine didn't include a "coarse meal.") 

Make a well in the center of the flour mixture.

Pour the buttermilk into the well and stir with a fork until the mixture comes together.

Crumble the dough evenly over the top of the blackberry mixture in the skillet.

Bake the cobbler until the blackberry filling is bubbling and the topping is golden brown, about 40 minutes. Let the cobbler rest (and cool the heck down) for 10 minutes before serving. Serves 8.


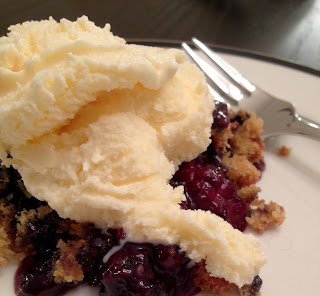
Like most cobblers, this one plays well with ice cream. 

This tastes like summer. Enjoy! 


Knoxville Pimento Cheese

Last night, Vasily and I celebrated our one year anniversary! (Yes, one year. I know, I can't believe it either. Thank you.)

And since we've been on the road so much, we decided to have a little stay-cation while Stella was at the vet getting fixed. She's not too happy with that decision.


For dinner, we tried Knox Mason. It definitely hit the top of my "favorite restaurants" list with just one meal.


French Broad to drink. Yum.

The food we ordered was really good - I don't think you could go wrong ordering anything here.

We started with the Pimento Cheese. I wouldn't have chosen this had I not seen almost everyone else in the restaurant starting with this. How good could Pimento cheese be? BUT OMG IT IS.

I ordered a plate for us, because everyone else was doing it. And I've never been more excited about pimento cheese. I told Vasily that I could eat that for the rest of my life.

And now I will attempt to make homemade pimento cheese because we have to stay in with our cone- head puppy:

Pimento Cheese, according to Paula Deen.

3 oz of cream cheese, room temperature
1 cup grated sharp cheddar
1 cup grated Monterey Jack
1/2 cup mayonnaise
1/2 teaspoon House Seasoning (recipe below... but if you're not feeling it, just throw in some salt and pepper and no one will be the wiser.)
2-3 tablespoons pimentos
1 teaspoon grated onion


In case you were as confused as I was: a grated onion is just what it sounds like. (Googled it.)
Take an onion, peel the outside like you normally would to cut it, pull out your cheese grater and go to town.

Throw the cream cheese into your electric mixer and beat until it's smooth and fluffy.
Add all of the remaining ingredients into the mixer and beat again until well blended.

Paula's House Seasoning:
1 cup salt
1/4 cup black pepper
1/4 cup garlic powder
Mix all of this together.

This makes a ton. A cup of salt? Really, Paula?

I tried to make 1/3 of this, but confused myself trying to figure out 1/3 of 1/4, so I just kind of eyeballed it. It tasted fine to me... I guess the trick would be more salt than black pepper and garlic powder, but Paula probably won't be checking your work, so it's all good. (Give me a break -- it's been a long time since Kumon.)


Pimento cheese mid-mix. 

I was very pleased with my first pimento cheese attempt. My trendy sister said that pimento cheese is "in" now, so go ahead -- impress all your friends and/or trendy sisters. 


Cuban chicken pizza


I've rediscovered an old college meal that used to be a treat (it was so fancy!), and have re-purposed it into my easy, go-to delicious weeknight treat (I now consider treats things like when I don't have much to clean up after dinner).

Cuban chicken pizza is 1. Delicious. 2. Fairly healthy. 3. Easy. 4. Adaptable.

Everyone needs a break during the week, and when I don't feel like really cooking, this is a lifesaver. It's a great way to use up leftover chicken (or any other kind of meat), and you can clean up your (little) mess while these babies cook. Win-win.

For 4 pizzas, you'll need:

4 10in tortillas
1 can black beans, rinsed and drained
1-2 ears of corn, off the cob 
4 tsp cumin seed (1 tsp per tortilla)
1 1/2 cup shredded cheese of your liking
1 lb chicken, cooked and diced (1 whole breast, or leftover meat)
Cilantro, chopped
Sriracha (optional)

Preheat your oven to 400 degrees.

Place flour tortillas flat on a rectangular baking sheet (you'll probably need two), so they're not overlapping. Sprinkle each tortilla with the cumin seed. Pop those suckers in the oven for 5-10 minutes to toast up (you can omit the cumin seed if you want, but you'll be sorry). You don't want them to brown, just start to puff up. Take them out once you can see them starting to puff and you can smell the cumin. 

Top tortillas with diced chicken, black beans and corn. Sprinkle with cheese as desired. Bake again in 400 degree oven until cheese is melted and tortillas have started to brown and get crispy- less than 10 minutes. 

Let the pizzas cool for just a minute, then sprinkle with cilantro and drizzle with sriracha, if you dare. The cumin + cilantro + sriracha combo is out of this world.


Viola! Easy weeknight meal. On to the next thing, Eaters.

Until next time,

Caprese Pasta by Frankenstein

I feel like I'm emerging from the woodwork.


Since we've last seen each other, I've been moving to Knoxville, traveling to Ukraine and generally having no idea where my kitchen is beneath all of the boxes.

I haven't located my measuring cups, but I didn't let that get me down: I still made a rather delicious caprese pasta. Original recipe found via Pinterest on this blog: Simply Scratch.

You'll need:
2 cups of orecchiette pasta
2 cloves of garlic
1/3 cup of Balsamic vinegar
3 tbsp olive oil
Fresh basil
1 cup of mozzarella pearls

Cook your pasta. I used small shells because I couldn't find the orecchiette pasta the original recipe called for. Whatever. Moving on.

Put two cloves of garlic through a garlic press.
Pour 1/3 cup of balsamic vinegar and whisk.
While whisking, slowly pour three tablespoons of olive oil. Set aside.

Cut up a box of little grape tomatoes into fourths, cut your basil into ribbons and drain those mozzarella balls pearls.

This makes me want to go back to Italy. Immediately. Who's with me? 


Once your pasta is ready, drain it and then combine all the other good stuff. Season with salt, pepper and of course pour on the balsamic / olive oil / garlic concoction -- as much as you want. (I didn't end up using all of it.)


I ate it warm, but I plan on trying it cold for lunch tomorrow. Yay, leftovers!

Happy eating -- I'm sure glad to be back.


Note: Tried it cold... it's better zapped in the microwave. Bon Appetit! 
Pin It button on image hover