In season: Blueberries

[Orange Almond Blueberry Muffins]

It's beginning to look a lot like blueberry season! Not only are they one of the best superfoods, they're also on sale this time of year! I found them for 2 cartons for $5.

I needed to make a treat for book club, so I pulled out my favorite baking cookbook of all time (I don't know if I've ever mentioned this cookbook before, but it is my absolute favorite in the whole wide world. ever. of all time. Have I convinced you yet? Go get one now. Amazon, folks. You don't even have to leave your chair.) and flipped to the Orange Almond Blueberry Muffins recipe.


That sounds like a lot of things to have in one muffin, but the bright, fruity flavors marry so well with the subtle, nutty almonds. And look how pretty! The recipe encourages you to use sliced almonds to decorate the tops in a floral pattern. I love those little touches.


So go out and grab you some fresh blueberries (and an orange and some almonds) and whip these up today! Your friends/coworkers/family members will thank you--they are delicious and nutritious (sorta)!

Orange Almond Blueberry Muffins
from Baked: New Frontiers in Baking, by Matt Lewis and Renato Poliafito

Grated zest of one orange (this is a pain, but worth it)
1/2 cup orange juice (I used the juice of the above orange and supplemented with regular OJ)
1/2 cup milk (they suggest whole, I used 2%)
2 egg whites
4 Tbs (1/2 stick) butter, melted and cooled (so you don't scramble the eggs)
1/4 cup finely ground almonds (pulse in food processor until fine)
2 cups flour
3/4 cup sugar
1/4 cup sliced almonds, toasted (didn't toast 'em. because I'm lazy.)       
2 tsp baking powder
1/2 tsp baking soda
1/2 tsp salt
3/4 cup blueberries (I used more like 1 cup, and it turned out fine!)
sliced almonds for decoration

Preheat oven to 375. Prepare muffin pan with nonstick spray or muffin papers.

In a medium bowl, combine orange zest, orange juice, milk, egg whites, and butter (if your butter isn't slightly cooled to room temperature, it will scramble the eggs. promise. and that's gross). Whisk until combined.

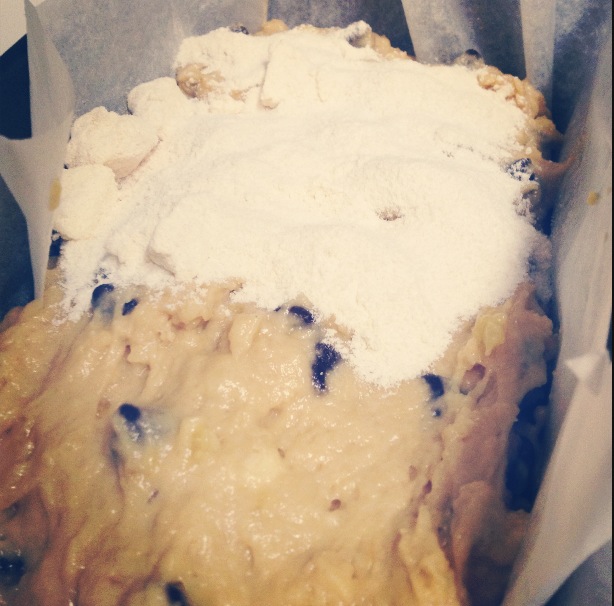
In another medium bowl, combine ground almonds, flour, sugar, sliced almonds, baking powder, baking soda, and salt. Make a well in the middle of the dry ingredients. Pour the wet ingredients into the well and stir until just combined (over-mixing makes tough muffins!). Fold in blueberries.

Fill each muffin cup about 3/4 full, and decorate with sliced almonds. Bake for 15 minutes, or until the edges are brown and a toothpick inserted into the center comes out clean. Let cool in pan 15 minutes, then remove to a wire rack.

Made 20 muffins


Healthy (Carrot) Cupcakes

Book Club (the best night of the month) is tonight! 

We pot-luck the food situation. I found this recipe in this month's Real Simple and since Martha's chocolate chip cookies are my go-to, I just had to try these Carrot Cupcakes

And Ms. Stewart came through for me, like always. So I'm real excited to impress my friends.


For the Cupcakes:
1 1/2 cups all-purpose flour, spooned and leveled
1 teaspoon baking powder
1/2 teaspoon baking soda
3/4 teaspoon salt
1/4 teaspoon ground cinnamon
1/4 teaspoon ground ginger
1/4 teaspoon grated nutmeg
3/4 cup (1 1/2 sticks) unsalted butter, melted
1 cup packed light-brown sugar
1 large egg
2 tablespoons plain low-fat yogurt
1/4 teaspoon pure vanilla extract
1 1/2 cups grated carrots (from about 4 medium carrots) **

For the Frosting:
1 package (8 oz) cream cheese, room temperature
1/4 cup (1/2 stick) unsalted butter, room temperature
1 cup confectioners' sugar
1 1/2 teaspoons pure vanilla extract
1 teaspoon grated orange zest (optional)

Action:
1. Preheat oven to 375. Prepare your muffin tins with liners, Pam, whatever you want.

2. In a large bowl whisk together flour, baking powder, baking soda, salt, cinnamon, ginger, and nutmeg; set aside.

3. In another large bowl, whisk together melted butter, brown sugar, egg, yogurt, and vanilla. Stir in carrots. Gradually add dry ingredients to butter mixture mixing until well combined. Divide among muffin tin. Bake 25-30 minutes, rotating pan halfway through until a toothpick inserted in the center of a cupcake comes out clean.

4. Remove from pan to a wire rack to cool completely before frosting.

Frosting Action:
Using an electric mixer, beat cream cheese, butter, and confectioners' sugar until smooth. Beat in vanilla and orange zest. Top each cupcake. 


Used the cut-the-corner-off-the-ziplock method (to impress yall).

**Note/ Confession: I asked Vasily to grate the carrots because I didn't want to work too hard. He grated 3 cups instead of just the 2 I needed and I felt bad for not telling him "when" so... I used all 3 cups. I was nervous, but the cupcakes turned out tasty, healthy, not overly carrot-y. 


Also, I found this: Me and Amanda during our study abroad in Sienna, Italy circa 2008. We wore sleeveless shirts to the cathedral so... had to sport these amazing super hero capes! 


Facing my fears: frying french donuts


I love Saturday mornings because they're my time to really experiment in the kitchen, usually in some form of breakfast food. and it usually takes so long that it turns into lunch also, which I'm totally fine with.

I usually try to attempt something that I wouldn't have time for on a weeknight. something that scares me even. something like heating extremely flammable oil up to ridiculous temperatures and putting stuff in it. Yes, I have a fear of frying. Not so much the frying part but the how-fast-it-can-go-from-good-to-bad part. It's trial by error and I'm not a fan of failing. Or achieving a failure. Or any of that nonsense.

[370° is scary hot, people.]

I decided that the potential deliciousness in this pin for French cruellers with honey glaze was greater than my fear (who doesn't love a twisty, fluffy, donut covered in a sweet glaze?!), and I dove right on in. I had a huge jug of canola oil on hand from the last time I attempted to fry something (spoiler alert: it went poorly). So I heated that up with my handy dandy candy thermometer and got out the fire extinguisher.

I've made pastry before (or as the French would say viennoise) but it's another thing that majorly intimidates me. Soooo many things that have to be just so and sooo many opportunities to go wrong. But I'm here to tell you this story has a happy ending.

I mixed the pastry according to the recipe (below), without burning the roux (heated mixture of milk, butter, and flour that makes the base of the "dough") and successfully incorporating the eggs. I ended up with this thick, sticky dough-stuff that I dumped into my piping bag with the biggest star tip I could find.

[Things are literally heating up over here.]

The recipe advises piping the cruellers onto squares of parchment to make the frying easier. And I'm an ESTJ so that's what I did. and it was brilliant, because it enables them to keep their shape because the dough is so sticky!

Okay. Fry time.

 [that is boiling oil, people. BOILING.]

Using tongs, I dropped five squares in at a time, parchment paper on the top. It almost immediately pops off and you can pull it out with the tongs. I left them for about 30 seconds on this side, but next time I'd do a minute. But I was so scared of burning them, that I was timid.

 [swirly twirly goodness]

Then I used the tongs to gently flip them over for the next side. I was thrilled to see how they kept their crueller shape! I gave them another 30 seconds on this side, but again I'd probably give them a minute both sides next time.

[My little beauties. no fire or anything!]

I used the tongs to pull them out, and dragged them, dripping, to the opposite counter to a cooling rack covered in paper towels, thus dripping boiling oil all over the floor. So I angled the rug to catch it all and carried on.

After I fried all of them (about 2 dozen total, though I'd make them thicker next time for fewer donuts), I mixed together the honey glaze and dipped the cruellers, twisty-side down. I had to add a little more milk to make the glaze thin enough to dip, but it was delicious.

[I think the French would be proud of these.]

I then proceeded to take a trillion photos, and by the time I got around to eating them they were kinda cold. Food blog problems. But I threw them in the microwave (shhh don't tell the French) for a few seconds and they were warm and perfect with a cup of coffee (at what ended up being 1pm).

All in all, my kitchen was covered in oil due to my bad practices, but the recipe itself was surprisingly easy! And the ingredients are all things you usually have on hand. I could hardly believe they actually turned out the way they were supposed to! Folks, if I can do this (fear and trembling and all), then you've got to give it a try. They are beautiful little treats that will really impress your friends. (Side note though: they don't save well. Like, not even one day. They turn to gritty mush. So eat up!)


French Crullers
from Doughnuts by Lara Ferroni, originally found here

1 cup water
6 Tbs unsalted butter (I used salted, no shame)
2 Tsps white sugar
1/4 tsp salt
1 cup all-purpose flour (sifting recommended, but who has time for that?)
3 eggs
2 egg whites, slightly beaten
vegetable oil for frying (I used canola oil, you know, to be healthy)

Honey glaze
1 1/2 cups powdered sugar
1 Tbs honey
4 Tbs milk (I used 5 to make it thin enough for dipping)

Bring the water, butter, sugar, and salt to a brisk boil in a heavy-bottomed saucepan. Stir in the flour all at once and continue stirring until the flour is completely incorporated. Keep stirring over medium-high heat. Lara says the more moisture you can remove, the more eggs you can mix in later which will result in a lighter pastry. When you see a thin film start to coat the bottom of the pan, the batter is ready. Transfer the dough to the bowl of a stand mixer. Use the paddle attachment to stir the dough for a minute to help it cool. Turn the mixer to medium speed and add one egg. Don’t add the next egg until the previous has been completely incorporated into the dough. Then add the egg whites a little bit at a time (I used two egg whites) until the dough becomes smooth and glossy and holds a little shape (not much). Lara warns not to add too much egg white or else the crullers will become heavy. Transfer the dough to a large pastry bag fitted with a 1/2-inch star tip.

Fry the crullers in 2-inches (or more) of vegetable oil in a heavy-bottomed saucepan. The oil should register 370°F. While the oil is heating, cut a dozen 3-x3-inch squares of parchment. Lightly grease the squares on one side (I brushed with vegetable oil) and pipe a ring of dough onto each of the squares. When the oil has reached temperature, carefully place a cruller, paper-side up, into the hot oil. Do this one at a time unless you like the idea of hot oil burns and other disasters. After a minute or so, I would use tongs and a sharp knife tip to gently peel the parchment off the cruller. When the cruller turns golden (about 2 minutes), flip it over and let it fry for another couple of minutes before removing it to drain on a cooling rack or paper towels.

Make the glaze: While the crullers cool, mix the confectioners’ sugar, honey, and milk together until smooth.

When the crullers are cool to the touch, dip the top of each cruller into the honey glaze and set on a cooling rack to let the drips run off. When the glaze has set, the crullers are ready to serve.

Crullers can also be baked. Preheat oven to 450°F. Pipe crullers onto a parchment-lined baking sheet at least 2-inches apart. Bake for five minutes then reduce oven to 350°F and bake another 15 minutes. Turn off heat, open the oven door a crack, and let crullers sit for 5 to 10 minutes. Glaze and serve.

Go to there: The Pinewood

 
[whiskey on whiskey on whiskey.]

Last week, Amanda called me up (and by that I mean g-chatted me) to see if I wanted to join her for dinner and cocktails at The Pinewood in Decatur, known for their whiskey selection and home of Whiskey Wednesdays (50% off whiskey cocktails!). She had an awesome ScoutMob Hand-Picked deal (sorry, it's over) that was going to expire, so off we went!

When they opened at 6, we were one of the first parties in the door. It was such a fun, not-overly-hipster atmosphere with a very cool looking bar and all the staff looked like they walked out of a Madewell magazine.

[The menus were in up-cycled legal file folders.]

The menu--food and cocktails--had us drooling as soon as it was handed to us (and by that I mean when we looked it up online earlier that day). I ended up going with a whiskey drink called the Day That I Die, with a big slice of ginger in it! Amanda went with the Van Lear Rose, gin mixed with rosewater.

[left, Amanda's Van Lear Rose. right, my Day That I Die]

Both were so beautiful and delicious that we had to try more. But first, the food.

[see that? that's andouille. in the dressing.]

We started with the jumbo sea scallop because, when you have a deal like this one, of course you go for the most expensive thing you can get! It was served on a bed of creamy grits and frisee with an andouille vinaigrette. You know something is good when there is sausage in the dressing. It didn't have the crisp you hope for in a scallop, but overall very, very tasty.

[photo from The Pinewood's website. I was too hungry to take one myself.]


I was thrown off by one of the items on the menu--a bolognaise pasta with a fried egg on top. What. I had never heard of such a thing. So I asked our waiter about it and he said it was his favorite dish on the menu. So of course that's what I ordered. and it was delicious indeed--such an unusual combination (to me) but the egg married so well with the spices in the sauce. I was very happy with my choice.

[That's a gala apple puree on top.]

Amanda ordered the grilled pork chop with sweet potatoes. It looked, smelled and tasted divine (isn't that just what you hope for in a meal?), and I know this because she was kind enough to share a bite with me. The sweet potatoes were caramelized so they were slightly sweet, which was just right with the pork chop.

So now, our second round of cocktails. We both chose from the "Monday laundry list" of New Orleans-inspired specials--a French 75 for me, and an absinthe frappe for Amanda.

[so pretty and elegant!]

I love a good French cocktail (champagne and gin. heaven.) so I was thrilled with mine. The only thing that could have made it better would have been drinking it in actual France.

[crushed ice = frappe.]

Amanda's, on the other hand, was super bizarre. Probably shoulda guessed that from the phrase "absinthe frappe," but still, we were surprised. It was exactly what it said it would be, with a heavy licorice flavor from the absinthe. Probably wouldn't choose it again, but the fault was ours, not theirs.

I'm eager to go back to Pinewood for Whiskey Wednesdays and try more of their cocktails. and food. Maybe the ScoutMob gods will hear our roar and have another Hand-Picked deal.

In the meantime, get yourself there! It's on the opposite side of the block from TacoMac. and remember they open at 6--so if you get there at 5:45 you'll have to kill time in the shops next door. or so I hear :)


Go to there: Buttermilk Kitchen

Since the first time I saw this logo, I've wanted to eat here. 


Vasily and I went to Athens on Saturday, but had no time for the pilgrimage to Mama's Boy. After I was finished pouting, I realized that we could still get a yummy brunch on Sunday! So I suggested we check out Buttermilk Kitchen. And holy cow am I glad we did.

Located off of Roswell Road in Buckhead, this little gem is a breakfast and lunch concept from chef Suzanne Vizethann who, I learned mid-bite-of-biscuit, won Season 8 of Chopped


I was too excited about the food to take pictures. 


We ended up sitting at the bar and had so much fun peeking into the kitchen (couldn't see everything, but I knew things were happening.) 

Bartender Brian told us his favorite things on the menu and all of them sounded freaking amazing -- I ended up getting the Pimento Cheese Omelet and Vasily got the Chicken Biscuit. (Not just any chicken, though -- the chef soaks the chicken in sweet tea overnight! YUM) Both were fantastic. The atmosphere was really fun, too. 

Even the woman at the other end of the bar was singing Buttermilk Kitchen's praises -- she said this was her third day in a row to eat there and she takes a to-go biscuit every time. She was superskinny though, so the biscuits are probably zero calories. In fact, they're probably so good / good for you, I bet you burn calories eating them. Yes. So I should go every day. 


This is definitely my new favorite brunch place. You've got to check it out. 

Oh and don't go without me. 


Do NOT drink this--but definitely bake with it!

When I think about must-haves in my pantry, the first thing that comes to mind is instant coffee granules. Before you crazy coffee-loving hipsters murder me, I promise you that it's not for drinking. However, instant coffee trumps regular coffee when it comes to one thing: baking.

When you want baked goods to have that coffee kick, instant is the way to go. You can make it super concentrated--almost like an extract or a syrup--and really intensify the flavor (whereas you'd probably have to use a whole bag of ground coffee to get the same effect).

Don't believe me? What if you heard it from an "expert"? Like maybe The Pioneer Woman? Or maybe Baked NYC? Ben & Jerry's? My favorite recipe from each of these includes instant coffee. Not just my favorite recipes, but ones that are requested over and over again by my coworkers and friends. Don't believe me? Give one (or all!) of them a try:


[Made these on-request for a shower or party of some sort. I've lost count.]

Pioneer Woman's Coffee Cake, Literally
Buckle up, coffee lovers. This one is for you. Not to be confused with the cinnamon-y crumbly stuff, this a literally cake that is coffee flavored. This is a HUGE hit at parties, people, either as cupcakes or a two-layer cake. The instant coffee granules in the frosting make a really neat presentation, and of course tastes delicious. Make it, right now.


[My coworkers love/hate me for these.]

Baked NYC's Banana Chocolate Chip Espresso Muffins from their cookbook, Baked: New Frontiers in Baking (my FAVORITE baking cookbook of all time ever ever ever.)
I blogged about these during Banana Bread Week, and they're too good not to mention again here. The coffee isn't all that prevalent--it serves more to enhance the flavor of the chocolate. My coffee-abhorring mom will even eat them.


[Now THIS will seriously impress your friends.]

Ben & Jerry's Coffee Heath Bar Crunch ice cream from their ice cream cookbook, Ben & Jerry's Homemade Ice Cream and Dessert Book.
My aunt gave me this ice cream maker (no messy salt and ice!) last year, and I was skeptical at first. Won't it just make that nasty, icy stuff like in chemistry class? However, she also gave me the Ben & Jerry's ice cream cookbook, and I am here to tell you that it tastes even better than you can imagine. Coffee Heath Bar Crunch is one of the first recipes, and I've barely gotten past it because I want to make this one over and over. My friend Kate always requests it for her birthday. It'll blow you away how rich and delicious it is. (recipe here)
 

 [Chunks, not chips, are key in these.]

One last way I like to use instant coffee is in these Santa Ana cookies that I stumbled across when I had chocolate chunks and pecans to use up. The coffee adds a subtle but yummy depth to the batter!


Now go grab some instant coffee granules and bake your way to the bottom of the can!


Links to Ruminate On

So I found these things... 


1. This beautiful Measuring Guide by 9th Letter Press. Lovely, practical and letterpressed! Yes, please.

2. A pizza stone. Ok, so I didn't exactly just find it: this was one of my most favorite wedding gifts (thanks, Amy & Justin!) and I really love it. I'm not sure that I've completely tapped into its full potential, but it makes pizza (even frozen) super fantastic. Vasily wants to try cookies... Stay tuned. 

3. I can't wait for Michael Pollan's new book "Cooked" to come out! April 23 is the expected release date! 

4. This shop - Harvest Haversack- has the cutest eco-friendly kitchen accessories. 

And if this week has been a complete doozy, this should at least hold you over til quittin' time.

Have a great weekend! Happy Eating! 


Banana bread so good you'll slap yo mama

[spiced chocolate chip banana bread]

Happy Thursday, eaters! It's almost the weekend, which means you need to be thinking about what you're going to eat this weekend, right? ...Right?

Good thing we've been bringing you our favorite banana bread recipes all week so you can budget for some delicious banana-y goodness this weekend to impress your friends. What's your fancy: an extra kick in your morning muffin? What about a little sweet and buttery extra sumpin sumpin on top? Or is it all the chocolate chips? We three eaters just couldn't put enough chocolate chips in our banana bread this week.

Well, chocolate or no chocolate, this here recipe for banana bread is the absolute best I've found. I could make this in my sleep. This one's different for a few reasons: I use half whole wheat and half regular flour, but this recipe does NOT come out too dense, dry or cakey because of the whole wheat. I also use olive oil instead of oil and/or butter. It also has some added spices: ginger, cinnamon and nutmeg. Don't be afraid. Once you taste it, you'll be kicking yourself for not putting ginger in your banana bread before.

You'll need:

3-4 medium to large bananas
1/3 cup olive oil
2/3 cup brown sugar
1/4 cup sugar
2 eggs
1 cup all purpose flour
1 cup whole wheat flour
1/2 tsp ground ginger
1/2 tsp cinnamon
dash of nutmeg
1 tsp salt
1 tsp baking soda
1 tsp vanilla extract
1/2 cup semi-sweet chocolate chips (optional)
To be alone when you eat this otherwise you might slap somebody

 
Preheat your oven to 325 and grease a large bundt pan (or bread pan).

Peel and mash bananas in a large bowl. Add olive oil, brown sugar, sugar, eggs and vanilla extract and beat until everything is incorporated.

In a separate bowl combine the flours, ginger, cinnamon, nutmeg, salt and baking soda and mix well. This is important. I know I'm always tempted to skip the "in a separate bowl" step, but don't. You want your baking soda to mix properly with the flour. I've found if you skip this step, there is some kind of dark magic about baking soda in banana bread (in particular)- if you don't mix it well in the flour prior to adding it to the bananas, you get disgusting pockets of bitter baking soda in your banana bread.

Once all your dry ingredients are mixed, slowly add and gently stir to your wet ingredients. I'd like to reiterate here something Laura said on Monday: don't over stir your batter. The worst thing banana bread can be is tough and dry. Now, add your chocolate chips at this point if that's what you fancy.

Pop that sucker in the oven for 45 minutes to an hour and it's done when you can stick a knife in the middle and it comes out clean.


[no mamas were hurt in the baking of this banana bread]


Enjoy, eaters!

Until next time,


Buttermilking the heck outta Banana Bread

I freaking love Banana Bread, so Banana Bread Week is like Christmas in Springtime. 

I've been nervous to try it because I love it so much and I don't want to ruin something so perfect. But I tried it anyway. (Mainly because spending $3 on a slice at Starbucks is bananas.)

I Tastespotted and found a recipe that I really like on a little blog called Just a Taste. It's my favorite because of the streusel topping (hello) and the buttermilk. Nom. 

Banana Bread with Streusel Topping
Makes 1 9-inch loaf. Needs to bake for 50 minutes. 

For the bread:
2 cups all-purpose flour
3/4 cup sugar
3/4 teaspoon baking soda
1/2 teaspoon salt
3 very ripe, darkly speckled large bananas, mashed well (about 1 1/2 cups)
1/4 cup buttermilk (See Laura's post about this.)
2 large eggs, beaten lightly
6 Tablespoons butter, melted and cooled
1 1/2 teaspoons vanilla extract
1/2 cup walnuts, pecans, chocolate chips or shredded coconut (optional)
For the streusel topping:
1/4 cup all-purpose flour
1/4 cup sugar
2 Tablespoons butter, slightly softened and cut into pieces

Directions:

Preheat the oven to 350ºF.
Line a 9-inch loaf pan with parchment then grease the parchment with cooking spray.
Whisk together the flour, sugar, baking soda and salt in a bowl. Set aside.

Mix mashed bananas, buttermilk, eggs, melted butter and vanilla in a medium bowl.


Lightly fold banana mixture into dry ingredients with rubber spatula just until combined and batter looks thick and chunky. Stir in any desired add-ins. (I always vote chocolate or butterscotch chips.) 


Scrape batter into prepared loaf pan.
Prepare the streusel topping by combining all ingredients in a bowl and using a fork to cut the butter evenly into the dry ingredients.
Lightly sprinkle the streusel topping over the unbaked loaf. (Go easy - you don't want this to be too thick or it just gets dusty.) 


Bake the bread for 50 minutes or until a toothpick inserted comes out clean.


Allow the loaf to cool in the pan for 5 minutes then transfer it to a cooling rack to continue cooling. Slice and serve.


Once it's cooled, make sure you store it sealed up. Great banana bread becomes less so when it's dried out. 

You can also make muffins to easy sharing / less guilty devouring. (And these only have to  bake for about 20 minutes.) 


I'm curious to know, what's your tried and true banana bread recipe? 


Pin It button on image hover