Pizza, Pizza

I don't think there's a better way to ring in the New Year than homemade pizza.

It's seriously not hard. Recipe from Pioneer Woman, so you KNOW it's good.

Pizza - selfie. 


Ingredients:
1 teaspoon Instant or Active Dry Yeast
1 1/2 cup of warm water (warm, not lukewarm)
1 teaspoon Kosher Salt
1/3 cup olive oil
4 cups all-purpose flour

Instructions:
Sprinkle yeast over 1 1/2 cups warm water. Let stand for a few minutes.
In a stand mixer* with a paddle attachment, combine flour and salt. With the mixer running on low, drizzle in olive oil until combined with flour.
Pour in yeast/ water and mix until combined -- the dough will come together into a sticky mass.

Coat a separate mixing bowl with a light drizzle of olive oil, and make the dough into a ball. Toss to coat in olive oil, then cover the bowl tightly with plastic wrap and set aside for 1-2 hours.
PW Note: it’s best to make the dough at least 24 hours in advance, and 3 or 4 days is even better.
When you are ready to make the pizza, grab HALF the pizza dough (recipe makes 2 crusts) and squeeze the dough toward the bottom to form a nice, tight, pulled ball. You can roll out the pizza with a rolling pin if you’d like, but sometimes it’s just as easy to throw it around and pull and stretch till it feels right. And when the crust is nice and thin, lay it on an oiled baking sheet or pizza pan. Drizzle a little olive oil on the dough and spread it with your fingers. Very lightly sprinkle some salt on the crust.
Preheat oven to 375 degrees. Top your crust with your toppings of choice. Then bake for 15 to 17 minutes, or until crust is golden brown and toppings are bubbly.

I found mushrooms, mozzarella  Boar's Head Pepperonis and some pre-made pizza sauce. It was to die for. And so easy! 
*Before I got married and had kitchen presents galore, I tried to make this with a $8 hand-mixer. I do not recommend this strategy. The dough is still up in that motor, may it rest in peace. 
Bon appétit and Happy New Year! \o/ 


When is that in season?

If you're like me, you probably don't have a farm, maybe not even a garden. And you may not have the pleasure of scouring the farmers market every other day for ingredients that still have dirt on them.

Chin up! You can still shop like a farmer! Check out this infographic to see when your favorite things are in season:


The Bountiful Year: A Guide to Seasonal Fruits and Vegetables
by Column Five Media.
Beautiful infographic via Visually.

I had no idea sweet potatoes were so short lived. And I still can't believe that grapefruits are winter fruits!

What do you find surprising?


Thanksgiving Breakfast: Blueberry Stuffed French Toast

Thanksgiving might be my favorite holiday. It means family, friends, road trips and excellent food. It also means spending-as much-time-around-the-table-as-possible and complete-disregard-of-caloric-intake. And it doesn't have to stop at the turkey!

My mom and MeeMee usually make this incredible breakfast feast after Thanksgiving. Is a bit labor intensive, but completely worth it.

You will need to begin the process the night before as it should chill overnight. (Sounds intense, but trust me: this is so completely worth it. I promise.) 

For the French toast:  
12 slices French Bread cut into 1-inch cubes
2 8-ounce packages cream cheese, chilled and cut into 1-inch cubes (I usually just use one package) 
1 cup fresh blueberries, rinsed and drained
12 large eggs 
1/3 cup maple syrup
2 cups milk

For the blueberry syrup:
1 cup sugar
2 tbsp cornstarch
1 cup water
1 cup fresh blueberries, rinsed and drained
1 tbsp unsalted butter 

Day 1: 
Grease a 13x9 baking pan
Place half of the bread cubes evenly in the prepared pan
Scatter cream cheese cubes over bread
Sprinkle with 1 cup blueberries
Arrange remaining bread cubes over blueberries


In a large bowl, combine all 12 eggs, syrup and milk and whisk to blend.
Pour evenly over reserved bread mixture. 
Cover with foil and chill overnight.

So many eggs. 


Mmm

Day 2: 
The next morning, make yourself a cup of coffee and preheat oven to 350 degrees.
Bake -- covered with foil in the middle of the oven -- for 30 minutes.
Remove the foil and continue baking 30 minutes, or until puffed and golden brown.

Meanwhile, in a small saucepan:
Combine sugar, cornstarch and water over medium-high heat.
Cook, stirring occasionally for 5 minutes or until thickened. 
Stir in 1 cup blueberries and simmer, stirring occasionally for 10 minutes, or until most berries burst. 
Add butter and stir until melted. 
Transfer to serving bowl.

Blueberries have not yet burst. 

Now they're bursting. I love this color. 


Serve on individual plates and top with blueberry syrup. Make yourself an extra large serving because you've earned it. 

Note: The syrup can be prepared up to 1 day in advance -- chill and reheat gently. 


Laura's Thanksgiving essentials: rosemary rolls, creamy mashed potaotes & bourbon pecan pie


Still have some holes in your Thanksgiving menu? Have no fear, the 3 Happy Eaters are here to help! This week, we'll each be sharing our favorite tried-and-true, must-have Thanksgiving recipes!

First up: three carb-o-licious staples from Laura.

[photo credit here]

This is a simple but impressive way to step up your bread game. My sister calls them Stick Rolls because of the delicious rosemary "sticks" sprinkled on top. These are definitely best served straight out of the oven, but make sure you allow 3-5 hours for the frozen rolls to rise. Make sure you get unbaked frozen rolls--the pre-baked ones will not work for this! Again, don't freak out over the amount of buter--just get organic and move on.

Rosemary Rolls (aka Stick Rolls)

bag of frozen, unbaked rolls (Rhodes is the brand I find at Publix)
butter, melted (depends on how many rolls you're making, but around 2 sticks--1 before cooking and 1 after cooking)
rosemary (I use dried bc lazy)
coarse sea salt

Spray a round pan (iron skillet, cake pan, whatever you have on hand) with nonstick spray, or rub with olive oil. Place rolls in pan an inch or so apart for room to rise. Cover with a clean dish towel and set in a warm-ish place (on top of an oven that's cooking your turkey, in the laundry room, etc) to rise for 3-5 hours.

When risen, brush generously with melted butter, and sprinkle with rosemary and sea salt.

Preheat oven and cook according to package (usually 350-400 for 10-15ish minutes). If you're so inclined, which I always am, brush again with butter upon removing from oven.


[photo credit here]

One of the most important dishes at Thanksgiving is the mashed potatoes. A friend of mine recently reached out to me for my go-to recipe because she felt like hers were just kind of boring. So if you, too, are looking for an easy way to spruce up this essential dish, look no further. (Disclaimer: if you're looking for a low-fat version of mashed potatoes, I don't wanna hear it. Stop counting calories and buy organic dairy products for "clean" fats that are actually good for you.)

PW's Creamy Mashed Potatoes
Makes a heaping 13x9 pan's worth. I usually halve it.

5 lbs potatoes (I use regular "baking" potatoes, but russet or gold are good too, whatever you prefer)
1.5 sticks of butter
8oz cream cheese, softened
1/2 cup half-and-half
1/2 tsp Lawry's seasoned salt
1/2 tsp black pepper

Peel and quarter potatoes. Bring a large pot of water to a boil and add potatoes. Cook for 30-35 minutes or until cooked through (a fork should easily slide into the potatoes with no resistance, but they shouldn't quite be falling apart).

Drain potatoes in a colander. Dump potatoes into a large mixer bowl with paddle attachment, and turn on lowest setting for a couple minutes to let steam escape. When steam has slowed down, start adding the remaining ingredients. (If you're into the mash-it-by-hand method, do that until most of the steam has escaped.)

Keep the mixer on the lowest setting, and slowly add the butter and cream cheese in tablespoon-size cubes. (The hot potatoes will melt and incorporate them better in smaller chunks rather than whole sticks.) Then, the mixer still on the lowest setting, add the half-and-half and let run until incorporated. Add the seasoned salt and pepper, and mix until incorporated. You can turn the mixer up higher to mash the remaining chunks, but don't over-mix or it'll turn to paste.

At this point, you can pour into a dish and serve, or pour into a dish, top with MORE pats of butter and bake at 350 until heated through (helpful if you've made them ahead of time).


Pecan pie is almost as essential to Thanksgiving as the turkey itself. As I've said before, I'm not ashamed of pre-made pie crust. Go right ahead and make your own if you want, but I am all for the packaged stuff. There are zillions of pecan pie recipes out there, but this one is my go-to because chocolate and bourbon. Of course, it's from my favorite baking cookbook, Baked: New Frontiers in Baking. I'm telling you: Christmas list that shiz!

Bourbon Chocolate Pecan Pie
from Baked: New Frontiers in Baking

1 pie crust (I've used both the in-pan version and the rolled up version, either work)
2 cups pecan halves, toasted (spread on baking sheet for 10 min at 350--don't skip this!)
3 eggs
3/4 cup light corn syrup (I don't wanna talk about it)
3 Tbs sugar
4 Tbs brown sugar
3 Tbs butter, melted
pinch of salt
1 tsp vanilla extract
3 Tbs bourbon
1 cup semisweet chocolate chips

Whichever crust version you go with, stick it in the freezer (in the pie dish) for a couple hours, or if you're lazy like me, just while you put together the other ingredients.

If you haven't already, toast your pecans. No arguing, just do it. Roughly chop 3/4 cup of them and set aside.

Preheat oven to 325.

In a large bowl, whisk together the eggs until combined. Add the corn syrup, sugars, butter, salt, vanilla and bourbon. Whisk again until combined. Stir in the chopped pecans.

Take your pie crust out of the freezer. Spread the chocolate chips evenly along the bottom of the pie shell. Slowly pour the filling you just mixed together on top of the chocolate chips. Sprinkle/arrange the remaining pecan halves (not chopped) on top of the filling.

Bake in the center of the oven for 30 minutes, then loosely cover the edges of the crust with foil and bake another 30 minutes (keeps crust from burning) until knife stuck in center comes out clean (no clumps of filling).

Cool on wire rack and serve warm or room temp.


Give these recipes a try this Thanksgiving, your family will thank you!


Essentially homemade chicken pot pie


Even though it's somehow basically summer again outside here in Atlanta, last week was absolutely frigid. so naturally I made my favorite cold-weather dinner: chicken pot pie.

I love this recipe because you can be as complicated or no-frills as you want to be with it. I think the most important part of a recipe is that it should be reasonably doable on an average night. So I took a potentially complicated, exhausting recipe and made it just that. Here's how:
  • Homemade crust? Sure, if you're into that kinda thing. Me, I don't have any kinda time for that business. Who wants to spend 5 hours making a (extremely temperamental) pie crust before even starting to cook dinner? Not this moi.
  • Another potential point of debate: the frozen veggies. Look. Look. Listen. Listen. Look. Come on, who really likes celery? I find no shame in grabbing the organic Publix-brand frozen mixed veggies that come in the exact amount that I need. aka more of what I want for less effort. I pick that.
  • Optional white wine aka an excuse to buy a bottle of white wine. Even if you're not into wine, it really does enhance the flavors, so don't skip it unless you really have to.
  • Final point of flexibility: the protein. If you've got a leftover chicken breast or two that you can cook and chop up: go for it. You can also buy a rotisserie chicken from the grocery and pull the meat off--sometimes it's cheaper than buying raw chicken, plus it's already cooked! Have leftover chicken from a roast? Use that. Lots of room for flexibility here.
Special Thanksgiving hint: this recipe is AMAZING with leftover turkey. Do yourselves a favor and set aside 2 cups of turkey so you can make this--it's WAY better than turkey sandwiches, I promise.

Okay, enough defending my choices. Just try it and you'll see for yourself. My family requests this over and over again, and it might just be what snags me a husband one of these days. It's that good.


Laura's Chicken Pot Pie

1 pie crust (if you get the two-pack from the store, freeze one for next time!)
1/2 stick butter
2 cups frozen mixed veggies
2 cups chopped or shredded chicken (or turkey!)
1/4 cup flour
2 cups chicken broth
splash of white wine (optional) (not really)
3/4 cup heavy cream
1/2 tsp salt (or to taste)
1/4 tsp black pepper (or to taste)
1/4 tsp thyme (or to taste. I use dried/ground because lazy)

Preheat oven to 400.

(Cook your chicken and shred it up if you haven't already.)

Melt butter in a large skillet. Toss in frozen veggies and, stirring, cook until heated through (a couple minutes). Add the chicken and stir, coating the chicken in the remaining butter. Sprinkle flour over mixture and stir to coat. Cook over medium for a couple minutes (this helps the chicken and veggies stand up to the liquids).

Pour in broth, stirring constantly to deglaze (get the crispy stuff off the bottom) the pan. Let it return to a simmer and add a splash of white wine. Stir and let return to a simmer. Then add heavy cream.

Bring to a slow boil and let simmer for a few minutes until the mixture thickens a little to an almost gravy-like consistency. While simmering, add salt, pepper and thyme. I hardly ever measure these things (#YOLO) I just keep adding and tasting until I'm happy with it.

Pour the mixture into a casserole dish or pie dish (at least 9-in). Unroll the pie crust and carefully place over the mixture, and press the edges into the side of the dish (so the insides don't boil out). Slice vents in the top of the crust.

Bake 30-40 mins or until golden and bubbly. Allow to cool just slightly before serving (because the inside will be at molten lava temperatures).


Make it tonight!


TGIFriday Video: Pumpkin Spice Lie-tte


Today's post might burst a few bubbles, but seeing as all three of us Happy Eaters have a background in journalism, we find it our duty to keep our readers informed. May the truth avail!

The pumpkin flavor craze has always driven me mad, mostly because I'm just not one for hype--but I'm especially not one for hype over a big fat marketing LIE (again, thank you journalism background for my overall cynicism toward advertising).

Anyone who has actually tasted plain pumpkin knows that their pumpkin flavor latte (almonds, M&Ms, etc) tastes nothing like pumpkin. It tastes like the spices commonly used in a pumpkin pie. But not actual pumpkin, as the name falsely implies. So really, if the marketers were honest (hahahahahaha), it should be called a cinnamon-nutmeg-clove latte. and now, thanks to the New York Times, we know that even these flavors are almost always synthetically manufactured with as many as 80 other additives to mimic the sensation of a pumpkin pie.

Don't believe me? Check it out for yourself:


Let the (pumpkin spice) truth set you free!


Pumpkin Chocolate Chip Loaf


One of my favorite things is cake disguised as bread. I'm not sure the details of the classification system, but if I can get away with eating cake for breakfast (lunch, dinner, dessert, snack) then I am all for calling it "bread."

I really love quick breads (aka quick cakes) because they fall in this category of cake/bread perfection, and because you don't even have to use a mixer to throw it together.

Here's my favorite fall quick bread recipe, coming from my all-time favorite baking cookbook by Baked NYC. If you don't already have it, put it on that Christmas list pronto! Perfect for a potluck or Thanksgiving celebration or just because--it's so easy you don't really have an excuse not to make it.

The recipe makes two 9-inch loaves, but is easily halved if you just need one.
Pumpkin Chocolate Chip Loaf
from Baked: New Frontiers in Baking

3 1/4 cups flour, sifted (or not sifted if you're me)
2 tsp ground cinnamon
1/2 tsp freshly grated nutmeg (or ground nutmeg if you're me)
1/2 tsp ground allspice (cloves would probably be nice too!)
1/2 tsp ground ginger
2 tsp baking soda
2 tsp salt
1 3/4 cups pumpkin puree (aka one 15-oz can)
1 cup vegetable oil
3 cups sugar (I used all white)
4 eggs
1 tsp vanilla extract
2/3 cup water, room temperature
1 1/2 cups chocolate chips

Preheat oven to 350 and grease & flour your 9-inch loaf pans (I use butter).

In a medium bowl, whisk together flour, cinnamon, nutmeg, allspice, ginger, baking soda and salt.

In a larger bowl, whisk together the pumpkin puree and oil until combined. Add the sugar and whisk again. Add the eggs, one at a time whisking well after each addition, and the vanilla. Add the water and whisk until combined (I wish I could tell you why you add rando water. It's going to seem watery and weird. but I promise it makes it moist and delicious. #science). Using a spatula, stir in the chocolate chips (yes, they'll mostly float to the bottom but don't worry).

Gently fold in the dry ingredients until just combined--try not to overmix.

Divide the batter between the pans (or pour it all in the one pan if you halved the recipe). Bake at the center of the oven for about 1 hour 25 minutes (depending on your oven. start checking it at 1 hr 15 min), or until a toothpick inserted in the center comes out clean. I was really worried that my edges were burning while the inside was finishing cooking, but it turned out perfectly, so be at ease and let it cook all the way through.

Let cool for 15 minutes in the pan, then invert onto a wire rack and cool completely. Or until your small group gets there and you can't wait any longer before diving into it.


Make this today! Your coworkers (book club, family, small group) will love you for it!


New shoes


Let's be real. Everyone needs a new pair of shoes, but they don't really need that pair of shoes.

Well, this is kind of the same. We got ourselves a new shmancy design. I'm pretty much in love with it.


It makes me want to pull myself up out of the feeling-bad-about-myself mode (winter, husband traveling, crazy neighbors) and get back on the learning to cook bandwagon!

All this just in time for Thanksgiving! And Christmas! Win-win-win.

So roll up your sleeves -- let's cook.


How to throw a dinner party without being Martha Stewart


Describe your perfect day.

This exercise was the icebreaker one week at the beginning of the small group bible study that Katie and I were in back in college. For some people this might be a tough assignment. But for me, it was easy, and my answer is still the same 4 years later: to spend the day cooking and getting ready for a dinner party with friends.

For a lot of people, the idea of throwing a dinner party is one of the most stressful things--pretty much the opposite of a perfect day! But it can also be so fulfilling to host a gathering where friends can enjoy each other around the table. Food brings people together.

In this post, I'm going to share with you some dinner party hacks from a get-together I threw recently that will hopefully empower even the most anxiety-ridden host, and save some dollars while you're at it! I'll even give you a whole menu of recipes!

Keep It Simple Stupid. This age-old saying definitely applies to stress-free dinner parties. Keep the guest list small, the menu basic, and the booze cheap. Simple does not have to mean boring or bad!


[photobooth fun. just like the college days.]

The Guest List
My friends make fun of me because I tend to "socially construct" get-togethers. I don't just invite every person I know every time, I'm very strategic about it. That might sound mean, but it relieves a lot of anxiety when you don't have to worry about people having a good time or getting along.

I usually aim for around 5 or so guests. There isn't a real science to it--that's just how many fit nicely around my table! I also find it to be a good size for everyone to be together in one conversation. and it's a typical serving size for most recipes, so you don't have to mess with doubling anything ($$$) or running out of food.

For this dinner party in particular, it was myself and four friends from college getting together to catch up. My fellow Happy Eater Amanda was among the mix. :)


[cheese on carbs. doesn't get any better.]

The Menu
Again, keep it simple! Don't have a hundred courses with a zillion complicated recipes. Italian is often a good direction to go--almost everyone likes it, it's fairly simple and it makes a ton! So here's a breakdown of what I served at my dinner party, with full recipes and everything!

It's always nice to have some kind of snacky appetizer while people are arriving and you're wrapping things up in the kitchen. A cheese tray is a simple and solid choice.

I had out a plate of sliced French baguette from the Publix bakery section with two wedges of cheese from the deli section: a Publix-brand brie and a Publix-brand aged sharp cheddar. Simple, cheap (yay generic brands!) and no cooking required! All you have to do is put it all on a plate and set on the table! If you're feeling adventurous, you can grab a pack of sliced salami and proscuitto (also found in the deli) to serve with the cheese.

For the main, I chose to make my dad's baked ziti (recipe below). It's simple and really easy to prepare in advance and pop in the oven when it's time go! oh, and it's also so delicious and makes a ton. wins all around. I started cooking it when I got home from work, assembled the baking dish, and stuck it in the oven to heat through when people started to arrive.

Along with the pasta, I had Amanda bring a Caesar salad (recipe below). Another reason to go Italian--a Caesar salad is much more simple than having to dice and chop lots of veggies because the lettuce and dressing are the stars of the show.

Lastly, I had a loaf of sliced White Mountain Bread from the Publix bakery and wrapped it in foil to heat up and serve with the pasta.


 [ice cream sammies. easiest, most impressive dessert!]

For dessert, one of my guests requested ice cream cookie sandwiches. Sounds intimidating right? Not the way I do it :) I had break-n-bake chocolate chip cookies that I had baked and stuck in the freezer the day before. When it was time for dessert, I pulled them out along with a pint of vanilla ice cream and spoons, and everyone assembled their own! Fun and delicious and impressive and yet nothing from scratch! You could even buy cookies in the bakery and skip the baking step all together! No shame.


The Booze
Yet another way that Italian wins is that wine is cheaper and easier than cocktails! Most likely at least one of your guests will ask if they can bring something, and wine is a great thing to request so you're not shouldering the cost of a few bottles on your own. We ended up with two bottles of red (including my fave, a $10 Mouton Cadet Bordeaux from Publix) and a bottle of white. We had a special treat because one of our guests brought his homemade limoncello--perfect for Italian!


Okay. So I've given you some time- and money-saving tips for throwing a simple, easy-going dinner party. Now it's your turn! I hope you feel empowered to go out and host your own. It's all about spending quality time with people you enjoy, so just breathe and break out another bottle of wine and everything will be great.

Let me know how it goes!


My Dad's Baked Ziti
1 jar of your fave spaghetti sauce (somewhere are 32oz)
1 box of ziti noodles
1 green pepper, chopped
1 lb of Italian sausage (I like using ground better than links)
2 cups shredded mozzarella

Cook noodles to al dente.

Meanwhile, brown sausage in skillet. Remove from pan, and saute green pepper.

Heat sauce in saucepan until bubbling. Add cooked sausage and green pepper and heat through.

Grab a 13x9 dish. Put down a ladle of sauce and spread around the bottom of dish to keep noodles from sticking. Add half the noodles and spread evenly. Spoon half the sauce over top. Add the second half of the noodles. Spoon the rest of the sauce over top, then top with cheese. (You can stop here and stick in the fridge until you're ready to pop it in the oven!)

Bake uncovered at 350 until bubbly and heated through.


Amanda's Caesar Salad

Romaine lettuce, chopped
Your fave croutons
Diced avocado (her secret ingredient!)
Parmesan cheese
Your fave Caesar dressing (Amanda loves Brianna's)

TGIFriday: How to say things, food edition


Happy Friday, Eaters!

Today we thought we'd help you out with this informative BuzzFeed with 22 food words you might be pronouncing wrong. We'd never want you to look bad by saying "ex-press-oh" or "kwin-oh-ah" so check it out and see how many you already know!

Two of my faves:


Bon appetit and bon weekend!


Cooking hack: Passion Tea Lemonade


I came down with a delightful case of tonsillitis this week, and when the doc said I need to hydrate, all I wanted was Starbucks' Passion Tea Lemonade 24-7. I did the math and decided that plan would completely wreck my Starbucks budget for the month, so I did what any good Happy Eater would do: DIY PTL.

It's actually stupid easy.


I boiled one tea kettle worth of hot water.

Put 6 Tazo Passion Tea bags in a pitcher.

Add some honey (for some reason, I count to 12? This is not technically a measurement, but it seems good to me.)

Pour the water in and let it steep for a long while -- maybe 5-8 minutes? The nice thing about the Passion tea is it never gets bitter, just delicious. So don't feel guilty if you forget about it while you pick up the hairbrush bristles your labradoodle scattered all around your bedroom as a "welcome home from work" gesture. Er-- I guess that was just me.

Add ice and set the pitcher in the fridge to cool off.

When you're ready for a glass, pour half lemonade and half passion tea in your glass and enjoy.

Homemade Passion Tea Lemonade. Good for the tonsils, good for by the pool, good for the wallet.

Happy drinking, eaters.


Huge Mistake: Cast Iron Skillet


I scraped out the remainder of my Blackberry Cobbler, scrubbed the skillet clean and threw it in the dishwasher. I pulled it out the next day and realized:


Apparently, those instructions on my skillet that said soap and dishwasher can "damage the finish" actually means "do not, under any circumstance, use soap OR the dishwasher." My pan was so rusty, I thought I was going to have to throw it away and take the trash out before Vasily got home so I wouldn't have to explain to him that I'd bought a one-time-use skillet.

Instead of throwing the skillet away, I thought I could try to take Laura's advice via The Kichn.

Turns out, all you have to do to get from this to this


is scrub the rusty ol thing with a little warm soapy water,
dry thoroughly,
lightly grease with vegetable oil on a paper towel.
Heat your oven to 325,
put the newly clean, greased pan upside down in the oven for 1 hour.
Read a crazy-good book while you wait.
When the timer goes off, finish your page and turn the oven off, open the door to the oven.
Let it cool down, then take it out of the oven,

And we're all back in business!


Am I the only one who has done this? What have you learned the hard way?

Smoked trout spread

Ok, so this isn't a dip. But it's not really a spread, either. To me, spread implies a certain (gross) consistency that this just isn't. But I'm going with the word spread because I'm not sure what else to call it. But I eat it on bread... And sometimes just out of the bowl, by itself. When no one's looking.

Smoked trout...goodness.

This is one of those meals I like to make in the morning ahead of time for lunch or save for a night when I have no time or energy to spend in the kitchen. It's so easy, so quick and so incredibly delicious. And it's just out of the box enough to impress your friends.
I first had this delicious little dish at one of my favorite neighborhood spots in Brooklyn, Strong Place. It was served as an appetizer, but it quickly became my favorite thing on the menu and usually my dinner when we went there. The combination of the charred sourdough, the sweet, tart apples and the smoky, salty fish is to die for.


This recipe is either a meal for two or a snack for four to six. It goes a lil something like this:

Smoked Trout Spread
2 smoked trout filets (I used the brand Duck Trap, which can usually be found next to the smoked salmon at most grocery stores)
Juice of 1/2 lemon
2 1/2 TBSP crème fraiche (look for it in where you'd find your fancy cheeses. Most stores carry this, but you might have to venture to a specialty shop or farmer's market for it)
Pepper to taste
Chives, to garnish
1 Granny smith apple, thinly sliced
4-6 slices grilled sourdough bread

Separate the fish from the skin (it peels right off) and place in a bowl- I use a fork to kind of mince the smoked trout. Once the fish is in tiny little pieces, add your lemon juice, crème fraiche (add another tablespoon if you want it extra creamy) and pepper and mix well. Garnish with chives.

Spread the trout mixture on the grilled sourdough and top with sliced apples. Enjoy!


Until next time,


Cooking hack: brownies edition


It's safe to say that my friends and coworkers would identify me as a baker. I love baking and find stress relief in it, and I even love the precision of it (the part that right-brained people hate!).

On weekends especially, you'll often find me trying my hand at some new and challenging recipe (like these French cruellers).

Whenever there is a potluck at work or a dinner party with friends, I'm automatically signed up to bring a dessert.

I've made dozens of cupcakes for parties and showers and the like.

When it comes to giving wedding gifts, I almost always go for a pretty cake stand or handy baking sheets.

But I have a confession to make. It's a dark secret. More specifically, it's a dark chocolate secret. and it's this:


These are hands-down the very best ever most perfectly delicious brownies I have ever had. and it's time for the world to know about it.

I know what you're thinking: "oh so you must doctor it up with your own fancy things, right?" Wrong. I wouldn't dream of messing with Ms. Crocker's perfection-in-a-box. I've tried my hand at dozens of from-scratch brownie recipes, and this box by far trumps them all.

This is the brownie for all people. Whether you like your brownies cake-y or fudge-y, whether you are into dark chocolate or not, these perfectly balanced brownies will make you roll your eyes at the ridiculous deliciousness of them.

Stop judging me! This is good news, y'all! I'm telling you that you no longer have to slave over melting chocolate and butter together, and you can stop searching for the perfect flour ratio. You can find this brownie mix at practically any grocery store and all you add are water, oil and 2 eggs. It's so cheap and takes no time at all!

I'm telling you, wooing your friends has never been easier. If you don't believe me, grab a box and try it for yourself. No matter your brownie proclivity, these will satisfy even the most picky palate.

Happy eating!


TGIFriday: Things to cook in August


It's August you guys! Can you believe that?!

I was trolling BuzzFeed this week and came across a glorious post on 31 things to cook in August, based on the yummy things that are in season as fall approaches.

I pinned the heck outta those recipes, here are some of my favorites to try soon!


Which ones catch your eye? Take advantage of the weekend and try them out for yourself

Happy eating!


From Market Square to Blackberry Cobbler

I went to the Market Square Farmers Market just to browse. And if you're anything like me, you realize that "browse" means "spend all the cash you have in your wallet." Saturday, I had $20. So I bought some of these zinnias,


a carton of blackberries


and a carton of blueberries.


I found this recipe for Blackberry Cobbler that A Thoughtful Eye shared from the Blackberry Farm cookbook. I was surprised at how not complicated it was, so decided to give it a shot. 


Blackberry Farm's Blackberry Cobbler

3 cups fresh blackberries
1 1/4 cups sugar (1 cup goes with the blackberries, 1/4 goes with the flour.)
Zest and juice of 1/2 lime
1 tablespoon cornstarch
1 1/4 cups all-purpose flour
1 1/4 teaspoon baking powder
1/4 teaspoon baking soda
1/8 teaspoon fine sea salt (didn't have this, used regular salt. Don't know what I'm missing out on...)
6 tablespoons (3/4 stick) unsalted butter, cut into small cubes and chilled
1/4 cup buttermilk (don't buy buttermilk! Do this instead.)

Preheat your oven to 350.

Pretty little lime zest. 

In a large bowl, toss the blackberries, 1 cup of sugar and lime zest.
In a small bowl (cereal bowl works great), whisk together the lime juice and cornstarch until smooth.
Drizzle the lime juice mixture over the blackberry mixture and toss to combine.
Scrape the blackberry mixture into a 10-inch cast-iron skillet and set aside. (*You can use a normal baking pan. But if you're like me and jump at any chance to buy something else to clutter your kitchen cabinets, I found mine at Target for $15.)


In a medium bowl, whisk together the flour, baking powder, baking soda, salt and 1/4 cup of sugar.
Use your fingertips to rub the butter into the flour mixture until it is the texture of coarse meal.

(I have no idea what that means. I just kind of blended it all together and the butter was still in little chunks. I tried rubbing the butter into the flour with my fingertips, but it was more than I wanted to commit to this endeavor. Choose your own adventure -- mine didn't include a "coarse meal.") 

Make a well in the center of the flour mixture.

Pour the buttermilk into the well and stir with a fork until the mixture comes together.

Crumble the dough evenly over the top of the blackberry mixture in the skillet.

Bake the cobbler until the blackberry filling is bubbling and the topping is golden brown, about 40 minutes. Let the cobbler rest (and cool the heck down) for 10 minutes before serving. Serves 8.


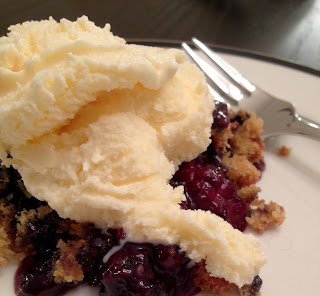
Like most cobblers, this one plays well with ice cream. 

This tastes like summer. Enjoy! 


Pin It button on image hover